Studio Monitors – What You Need to Know
Posted on Wed 16 September 2015 in Computer Music
Studio monitoring is one of the most important aspects of music production. After all, if you can’t hear what changes need to be made to make your mix sound as good as possible, then how do you know what to change and by how much?
This article aims to give you enough knowledge about studio monitoring so that you can make an informed decision as to which monitors may be right for you.
Volume and Speaker Size
Firstly, what kind of volume level are you working at?
If you have the luxury of a well sound-insulated studio where you can “turn it up”, then you might like your speakers to sound “big”. The size of the speaker is usually the primary factor when it comes to volume, and this also has a bearing on the amount of bass the speaker may be able to reproduce (see below under ‘frequency response’). However, if you are working at more moderate levels (and really, mixing should be done at these lower volumes), then more important is how accurate your monitors are at “normal” volumes.
Don’t make the mistake of buying big and loud monitors, and then not being able to turn them up!
Monitors have historically been divided into three types – near-field, mid-field and far-field. The idea being that near-field or “smalls” are used at lower volumes closer to you, and far-field “bigs” would be usually wall-mounted at the back of the control room, with mid-field somewhere in between. Home and project studios are very unlikely to have the space or budget for a set of “bigs”, so the most suitable will be near-field, and for larger studios perhaps mid-field monitors.
To get an idea of how loud monitors may go, looking at the spec’s and the rated power (in Watts) will give you a clue. Generally, the power will be quoted separately for each part of the speaker – eg. Tweeter 50W, LF Driver 250W. It is worth bearing in mind, however, that these figures do not take the efficiency of the speaker into account, and therefore is only a guide to the volume you are likely to get from any particular monitor.
Frequency Response
As humans, we can hear frequencies down to 20Hz at the bottom end, and up to 20kHz at high frequencies, although when you get to my age, you might be lucky to hear much above 16kHz!
Most speakers extend upwards to at least 20kHz, with many reaching 40-50kHz. But why would we need speakers that extend more than an octave above what we can hear? Well, for two reasons – a) some research suggests that although we don’t “hear” these higher frequencies, we do actually sense them, and b) if the tweeter is working to way above 20kHz, then any “ripples” or fluctuations/bumps in the frequency response (an inevitable characteristic of any speaker at its frequency limit) will be up above the limit of our hearing, and this “non-flat” behaviour at much higher frequencies will not be noticeable.
At the other end of the frequency scale, the low end, there can be significant differences between different monitors. Some smaller speakers only extend down to 50-60 Hz, that’s a whole octave and a half of musical information you are just not hearing. Now, depending on what kind of music you are doing this may not be a problem, but certain types of music – eg. club or dance music, often rely on this sub bass to give the required power and energy. If you can’t hear what is happening down there, then the level of the sub bass parts in your track can not be set properly. There are three ways of getting round this issue – a) use larger monitors that extend to lower frequencies, b) add a separate sub-woofer speaker to your monitors, or c) bear in mind that your speakers are not telling you the truth and use some good studio headphones instead to set the volume of any bass instruments.
Broadly speaking, the larger the low frequency driver (woofer) of a speaker, the lower the frequency response. However, larger woofers are usually heavier, and therefore won’t react as quickly as a lighter driver would. This can affect the way the speaker sounds – trying to move a larger speaker quickly will often result in a less punchy sound, and the bass end, although you can hear it, may be come across as quite “wooly”.
For the above reasons, LF drivers range from 8 inches to about 4 inches, and often the size of the driver is reflected in the model name – eg. KRK RP5 has a 5 inch woofer, RP6 is 6 inch, with Tannoy Reveal 802 being 8 inch.
The material with which the driver and tweeter are made also has a bearing on the sound of the speaker. As stated above, a heavy driver won’t react very quickly, so certain materials are used to improve this. Kevlar is a good example of a lightweight, stiff material that has been put to good use in some speakers, Adam Audio, for example, uses Kevlar cones in their AX range, and this results in good transient response and a more defined sound.
Tweeters also need to be lightweight and stiff, and Focal, for instance, employ beryllium as the metal used in some of their high frequency units. This material can me made very thin, but still retains its shape due to its stiffness properties. This results in more detailed top end in monitors like the Focal Solo, Twin and Trio models.
Another tweeter design worth mentioning is the ribbon tweeter as employed by Adam Audio in all of their monitors. These tweeters are very light, and extend to 50kHz, creating a very open top end and delivering great high frequency detail.
Ported cabinets
One way to improve the low frequency extension of a speaker is to design it with a port (a hole or vent), that changes the way the LF driver behaves inside the speaker enclosure. By adding this port, the “natural resonance” of a speaker is lowered, and the result is more bass.
This is a good strategy, but there are pitfalls to be aware of – if the port is at the back of the speaker (“rear ported”), and the speaker is close to a wall, then this can upset the acoustic resonance set up by the port, and therefore change the bass response. Also, if a small speaker is relying on a port to extend the bass, quite often the clarity of those low frequencies is sacrificed – the bass can sound quite “artificial” – which in many ways it is!
2 and 3-way speakers
Any speaker has at least an LF driver, and a tweeter for HF. This is necessary to get the full range of frequencies, as no single speaker can reproduce all of the audible frequencies. Using this strategy speaker manufacturers can get good results, but taking this idea one step further and adding more speakers can mean even better results.
A 3-way monitor makes use of an LF woofer, a mid-frequency driver, and an HF tweeter simultaneously. This design makes it possible to design a speaker with better frequency response, while still reacting quickly to sudden changes in the mid-range.
Examples of 3-way speakers include the Focal SM9, KRK RP10-3, and Adam S3X. For more on 3-way systems please see this article. Fancy a 3-way
Stereo Imaging
We use two speakers in stereo to simulate a “sound stage” in front of us. What this means is that sound doesn’t come from just one speaker or the other, it can be “placed” or “panned” into any position in between the speakers.
How well a pair of speakers does in this regard is very important, especially in certain genres like classical music where the recording is often made to reproduce the physical layout of an orchestra as if it were in front of you. The ability of a pair of monitors to faithfully reproduce the stereo information in the recording is known as its “stereo imaging”.
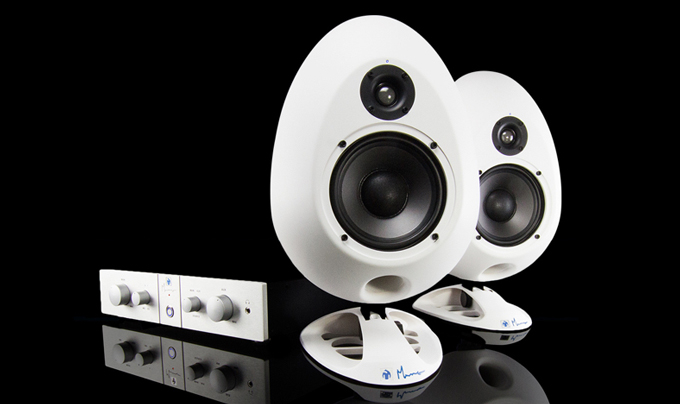
Well-engineered monitors will be closely matched so that their responses are very close to each other, and this is one factor in ensuring a good stereo image. Another factor is the design of the speaker cabinet, and one thing that causes stereo imaging to become less accurate is the corners of the cabinet – as sound hits these hard edges it gets bounced off in a different directions (this is known as “refraction”), and upsets the stereo image. Various manufacturers have gone to great lengths to try and reduce refraction effects, for example the rounded corners of Genelec monitors, or the completely rounded enclosure of the sE Munro Eggs.
A good pair of monitors will have a defined stereo image where the “location” of each instrument can be clearly heard. This positioning (panning) is one way to separate instruments so they can be heard together without fighting each other, so stereo image is important where the music will be heard in a stereo listening environment. On the other hand, if you are writing dance music destined for a club sound system, then it may not be quite so important.
Your Listening Environment
You may have the best speakers money can buy, but if the room they are used in is not considered, then your monitors are not working the way they should be for you, and your mixes will most likely sound wrong.
The laws of physics will always conspire to make your room play a big part in the sound you can hear. The main two issues are a) reflections of high frequencies off hard surfaces, and b) the build-up of standing waves in the room causing different areas of the room to have more or less bass.
What these issues result in is a) a “live” sound to the room, with reflections bouncing around creating a short “reverb” and upsetting the stereo imaging, and b) parts of the room that have dead or quiet spots at certain frequencies.
So what can be done to minimize these room effects?
Without re-writing the whole book on room acoustics, here are some pointers:
Set your studio up in a larger room – this moves the standing wave issue down to lower frequencies, where they may not be so obtrusive.
Move your speakers away from the wall – speakers against a wall increase the bass response, and can make the standing wave issue worse.
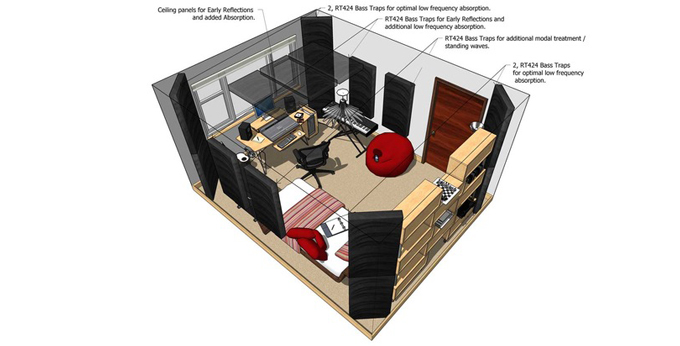
Use bass traps in the corners of the room – this can help to “soak up” some of the low frequencies, and reduces the standing wave issue.
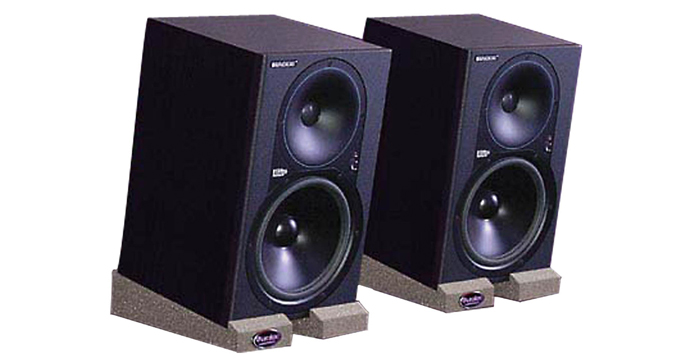
Isolate your monitors from the surface they are sitting on – this can make a big difference to the “tightness” of the bottom end. There are some great solutions for this including Auralex Mopads and Isoacoustics desktop monitor stands.

Treat large reflective surfaces with some acoustic panelling – the high frequency reflections can be reduced by putting up absorbtion panels (often made of foam), this will deaden the room enough so as not be so “lively”.
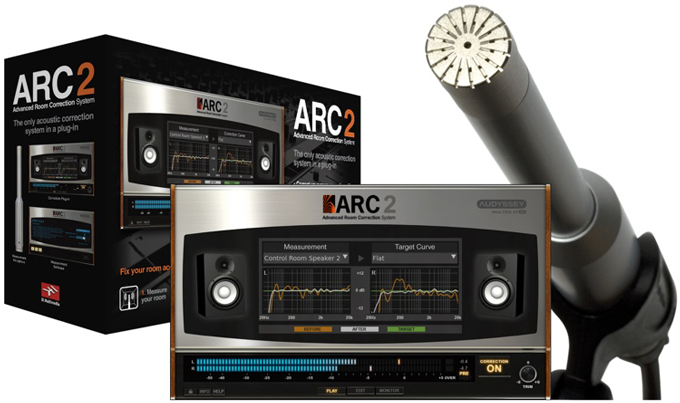
Use a “room correction” system – there are products available that can analyse the frequency response of your room, and apply a “corrective” EQ to even out any peaks or dips in the frequency response. Eg. the IK Multimedia ARC system.
Conclusions:
You may be restricted by budget when choosing monitors, or you may be limited by the room that you have to work in. However, if you keep the above points in mind, you should find monitors that work well enough for you to be able to produce decent mixes that “travel well” (ie. They still sound good when played in other listening environments).
If you have only a small room, then get smaller speakers (5 or 6 inch) and a good pair of headphones.
If your room needs treating to make it sound reasonable, then seriously consider, and budget for acoustic treatment.
When you have your monitors, try them in various locations, and listen for things like stereo image and standing wave issues, then find a “sweet spot” in the room from where you can listen and get an even frequency response.
Decide on a budget that you are prepared to spend, and choose the size of monitor according to your room. Then, ideally, go and listen to the few pairs that sit within those criteria. Listen for things like fine detail in the top end, clarity of the mid-range, and “tightness” of the bottom end. Also look out for differences in the stereo image created.
And lastly, as it is you that has to work with your monitors for hours on end, make sure you “like” them! If you find them too bright, or too fatiguing/tiring, then you won’t get great results, so go with your ears, but still bear in mind all of the above points.
Happy mixing!