PRO TOOLS EXPERT TIPS
Posted on Tue 10 July 2012 in entries
 Get to grips with a bit of Pro Tools know-how with these expert tips rounded up by PT junkie Russ Hughes...
MEET THE WRITER: RUSS HUGHES
Long-time Pro Tools user and self-confessed computer geek Russ is founder of the pro-tools-expert.com blog (formerly known as the AIR Users blog) and can often be found sharing top PT tips online.
PRO TOOLS EXPERT TIPS
Whether you’re a die-hard Pro Tools user, new to Pro Tools or thinking about making the switch, this list of hot tips from Pro Tools gurus and top producers and engineers who are using Pro Tools day in, day out is indispensable. I’ve tried to include many of their favourite keyboard shortcuts, plug-ins and workflow secrets. With all these top tips it’s easy to see why so many people love working with Pro Tools.
START A TAB
Next time you need to edit audio in Pro Tools, take a tip from the top editors. Use the TAB key to move to the next transient on the timeline. It’s one of the things that has made Pro Tools number one with top studios and engineers. Before long you’ll be flying through edits. Turn it on using the icon shown below.
[caption id="attachment_4357" align="aligncenter" width="257" caption="Tab to Transient"] ]({static}/uploads/2012/07/Tab-to-Transient.jpg)[/caption]
HOLD IT TOGETHER
In Pro Tools 10 many producers group together audio regions or clips. It’s easily done, simply using the shortcut Cmd + Option + G (Mac) or Cmd + Alt + G (Windows). It holds your audio together and doesn’t use up disk space, plus you can ungroup at any time you like.
WHAT'S SUPPLIED?
Before thinking about spending money on virtual instruments, take a leaf out of Grammy Award-winning producer Noah ‘40’ Shebib’s book, who is making chart-topping hits using Xpand2 (see below), just one of several VIs included for free with Pro Tools. Pro Tools also ships with a vintage beatbox, a dirty vintage monosynth, a grand piano, Hammond organ and a sampler. These instruments are definitely worth exploring, and you’ll find loads of tips and videos about how to make the best of them on our Pro Tools Expert website: www.pro-tools-expert.com
[caption id="attachment_4361" align="aligncenter" width="874" caption="Xpand2"]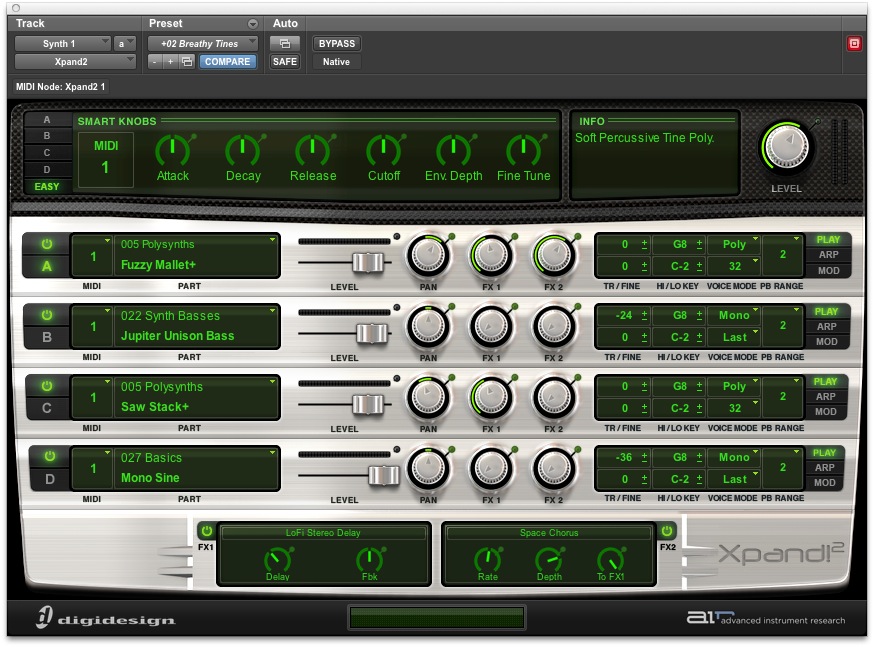 ]({static}/uploads/2012/07/Xpand2.jpg)[/caption]
GET WITH THE GAIN
New to Pro Tools 10, clip gain (see graphic below) allows you to choose as many points on the audio and adjust the gain. It takes seconds to learn and allows audio level adjustment that is forensic and fast!
[caption id="attachment_4358" align="aligncenter" width="1044" caption="Clip Gain"] ]({static}/uploads/2012/07/Clip-Gain.jpg)[/caption]
GET IN A GROUP
When doing any audio edits using Beat Detective or Elastic Audio, you need to retain both their timing and phase relationship otherwise it will just sound like a mess. Use Groups to edit the whole group at one time; it’s a must!
PERFECTION IS POSSIBLE
Need a perfect take? It’s easy in Pro Tools. Go to the Options tab in the Preferences window and choose ‘Automatically Create New Playlists When Loop Recording’. Now put your Pro Tools into a loop and record away. Then choose Playlist view in the track and all your takes are there ready to be auditioned and compiled into one great take (as seen in the screengrab below). It’s perfect for vocals and lead guitar and you’ll be amazed at the results.
[caption id="attachment_4359" align="aligncenter" width="1274" caption="Perfect Lead"]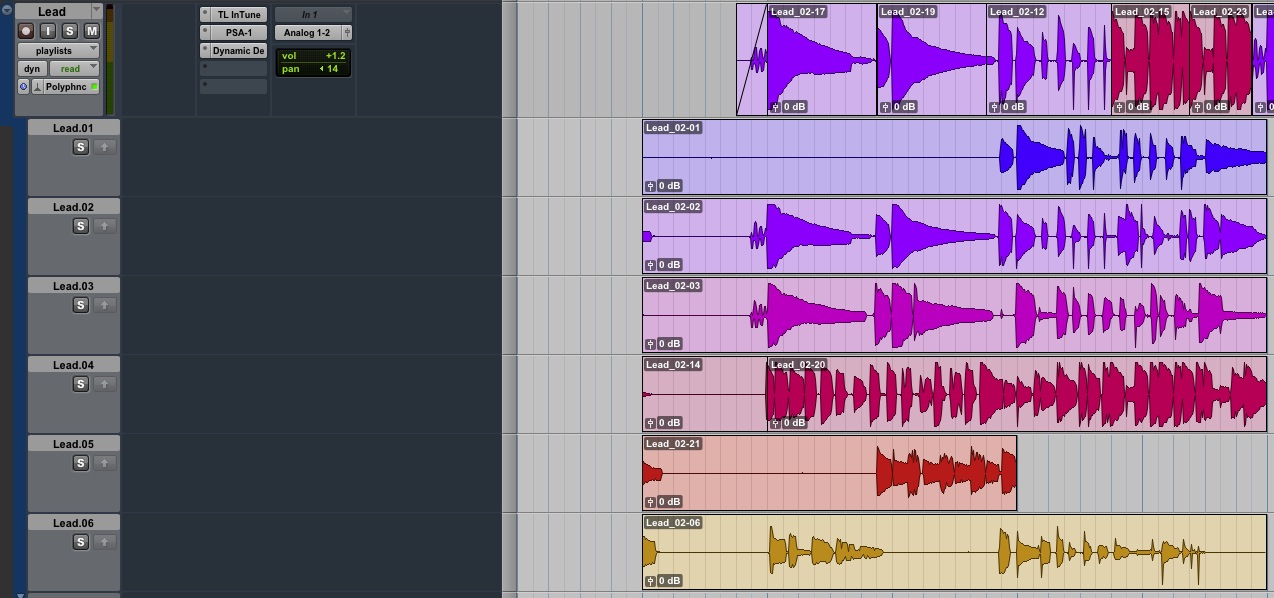 ]({static}/uploads/2012/07/Perfect-Lead.jpg)[/caption]
ELASTIC AUDIO
Got a loop that you want to drop into your track that’s a different tempo, or want to slot in a bassline that’s a different pitch? No worries… with Elastic Audio, you can change both the tempo and pitch of any audio. Even better, you can fix the timing of any performance or you can take a section with 4/4 time signature and turn it into 6/8, easy! There are four different algorithms to choose from with most of the hard work done within Pro Tools. With Elastic Audio, tempo and key restrictions are a thing of the past.
XPAND YOUR OPTIONS
I know that I've already mentioned Xpand2, but one thing a lot of people don’t realise is that it has a cool set of arpeggiators that can inspire your songwriting efforts. Fire up an instance of Xpand2 and find out just how inspiring it can be!
TRY A TEMPLATE
Using Templates for session and I/O Setup and creating a click track to speed up set-up is a must. Why reinvent the wheel each time you want to start creating? Pro Tools ships with loads of suggested templates, but take a few minutes to create your own, then each time you start up Pro Tools you can get to work right away.
GOING LOOPY!
Use Workspace Catalogs (see below) to keep track of all your loops and audition them in tempo in the Workspace. It’s the perfect way to have everything to hand and audition all your stuff in time with the track.
[caption id="attachment_4360" align="aligncenter" width="834" caption="Workspace Catalogs"]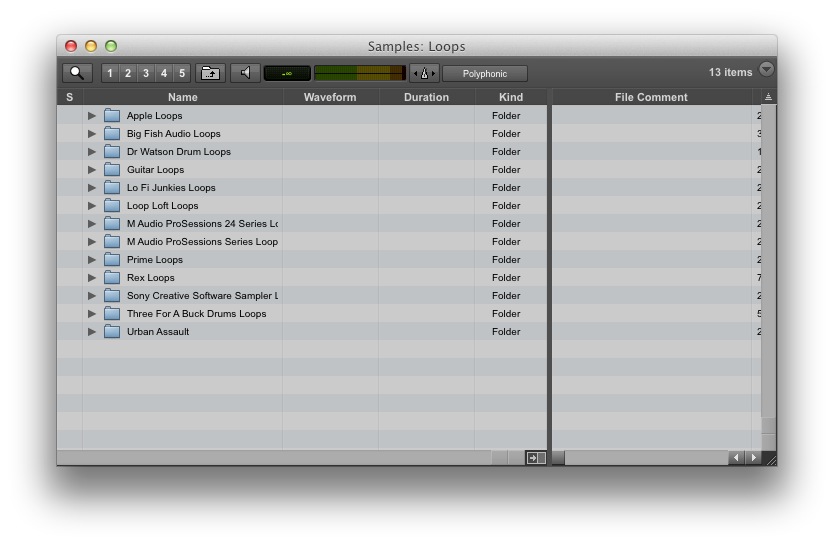 ]({static}/uploads/2012/07/Workspace-Loops.jpg)[/caption]
INSTANT RECALL
Get used to using Memory Locations and Window Configurations to quickly switch between different views in the Edit or Mix Windows. Memory locations not only help you find your way around the different parts of the song, but also, when combined with Windows Configurations, help you to have the right stuff on screen when needed.
ONE, TWO, PLAY IN TIME
Do you hate working to a metronome? If you do, then you can have Pro Tools follow your playing instead of the other way around. Simply get down your acoustic, keyboards or drums and then tab through the track bar-by-bar to map the tempo of the track using Cmd + I (Mac) or Ctrl + I (Windows) to identify the beat. Then all your other MIDI and tempo-based devices will follow the track.
ME? MULTITASK? OH YES!
Cmd + Alt + Shift is a shortcut that lets you choose a number of tracks and apply the same track inputs, sends or outputs. Why do one track at a time when you can do them all at once?!
WOULD SIR LIKE A TRIM?
If you’ve already worked hard to automate the volume levels of a track but need to adjust the overall gain then add in the Trim plug-in as an insert, then you can adjust the gain relative to the automation.
BE AN AIR HEAD
Check out the cool supplied effects from the AIR group. Vintage Filter (shown below) can transform a synth part with rhythmic filtering effects. Try playing a basic synth part and then adding Vintage Filter; if nothing else it can give a real ‘old-school’ sound to even the most modern synth. It’s great on electric guitars too.
[caption id="attachment_4362" align="aligncenter" width="467" caption="Vintage Filter"]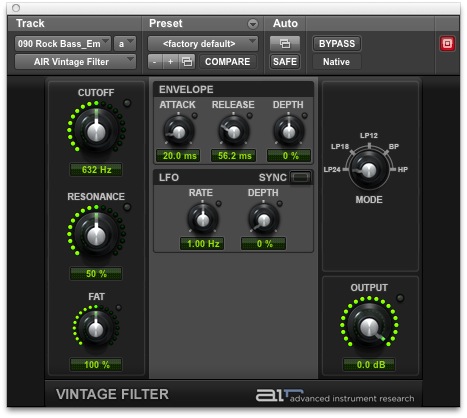 ]({static}/uploads/2012/07/Vintage-Filter.jpg)[/caption]
THE IMPORT BUSINESS
Import Session Data (Opt + Shift + I) is a massive time-saver. If you’ve nailed the perfect effects chain or snare sound in a previous project you can import pretty much any session data you want with this powerful CMD. You can also use it if you want to start from scratch to try out a completely different edit and mix of a track.
[caption id="attachment_4363" align="aligncenter" width="804" caption="Import Session Date"]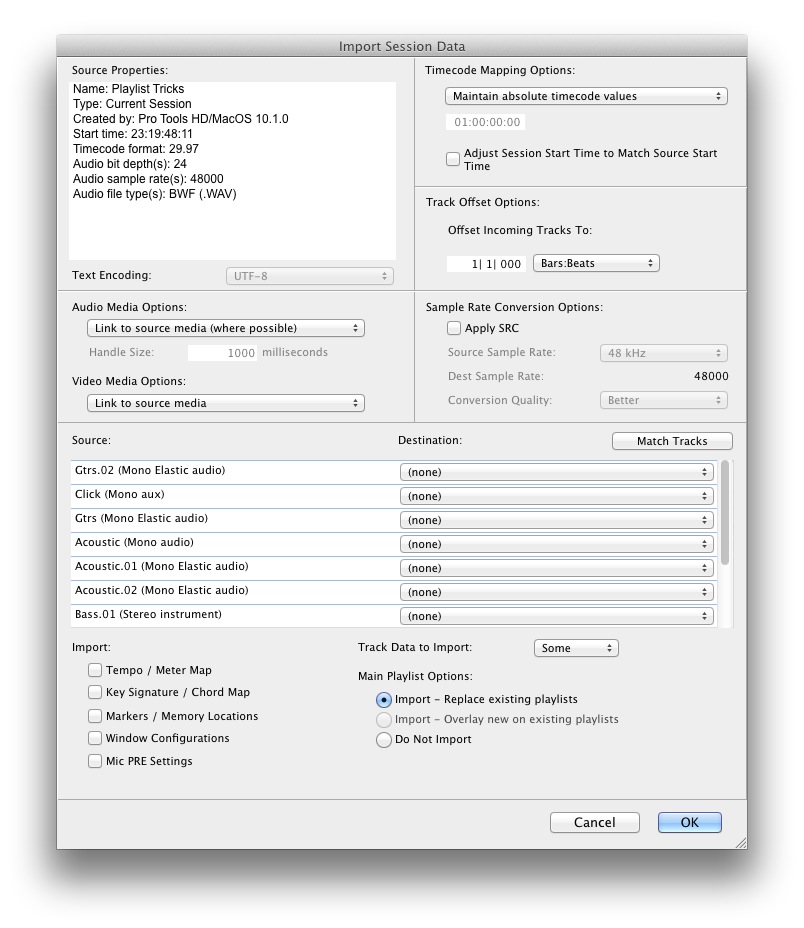 ]({static}/uploads/2012/07/Import-Session.jpg)[/caption]
BE A WIDE BOY
Need to create a stereo track from two mono tracks? That’s easy; simply create a new stereo track using Cmd + Shift + N (Mac) or Ctrl + Shift + N (Windows) to create a new track and then select and drag the two mono tracks together into the new stereo track. See it in action in the large screengrab below.
[caption id="attachment_4364" align="aligncenter" width="933" caption="Stereo Guitars"] ]({static}/uploads/2012/07/Stereo-Guitars.jpg)[/caption]
HELP… I NEED SOMEBODY
If you know where to look, all this information is at the tip of your fingers all the time. Simply go to the Pro Tools Help menu for instant access to the plug-in, keyboard shortcuts, menu and reference guides. It’s well worth making the time to learn them if you want to become a Pro Tools Ninja!
[caption id="attachment_4365" align="aligncenter" width="350" caption="Help Menu"]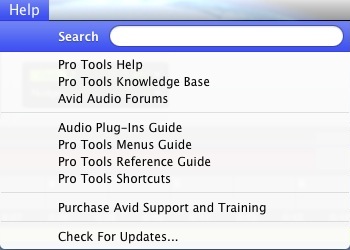 ]({static}/uploads/2012/07/Help-Menu.jpg)[/caption]
‘X’ MARKS THE SPOT
Save time creating smooth transitions in your automation with the ‘X’ shortcut. If you have a step in the automation, drag over it to select the time for the automation change. Hit ‘X’ (in keyboard focus mode) to create a gradual fade. It’s just perfect for drawing de-essing volume automation.
HE SHOOTS, HE SCORES!
Use the 'Export Sibelius' option to quickly save a Pro Tools track as a .sib file.
A PERFECT FIT
Use the Cmd + Alt + Ctrl + Up Arrow (Mac) or Ctrl + Alt + Win Key + Up Arrow (Windows) to have all your tracks fit to the Edit window height. A must if you need to see all your tracks in one window.
HOPE THIS HELPED
So there you are, just a tiny selection of tips and tricks from the Pro Tools pros. We’re sure you have your own, but hopefully these helpful hints will give you a little more time to make those killer sessions in Pro Tools!
For more information on Pro Tools, click the links below or give us a call on 01202 597180. We also sell Pro Tools HD systems - give us a call for more information!
Pro Tools 10 Upgrade - More Info/Buy
Pro Tools 10 Crossgrade (from LE) - More Info/Buy