NEKTAR PANORAMA P4, P6 & P1 REVIEW
Posted on Tue 03 September 2013 in entries
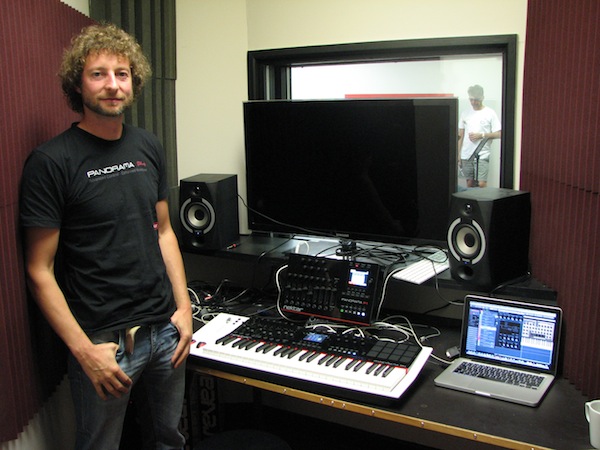
We were recently joined in our Bournemouth pro-music superstore and studios by Tim Chandler, Product Manager for Nektar's Panorama controllers. After hooking a Panorama P4 keyboard, Panorama P1 control surface and Reason Balance interface up to his Mac computer, Tim proceeded to demonstrate how their products could significantly improve your workflow, whatever software you are using. He even let us get hands-on for ourselves!
In this review I'm going to explain how Panorama controllers can help speed up how you work as well as give my honest opinions on the products. Please note that although I've included the Panorama P6 in the title of this review, it wasn't actually one of the products that I got hands-on with. However, the P6 is exactly the same as the P4 apart from the fact that it has a few extra keys so I can safely assume that any comments I make about the Panorama P4 will also hold true for the P6.
*** Update: I ended up buying a P4 for myself! Read the end of my review to find out what I think about it now that I've had it integrated within my studio for a few weeks. ***
NEKTAR PANORAMA CONTROLLERS - WHAT ARE THEY?
Panorama controllers are hardware devices for getting more hands-on with your DAW software, plug-ins and virtual instruments. After all, who wants to be a slave to a mouse?
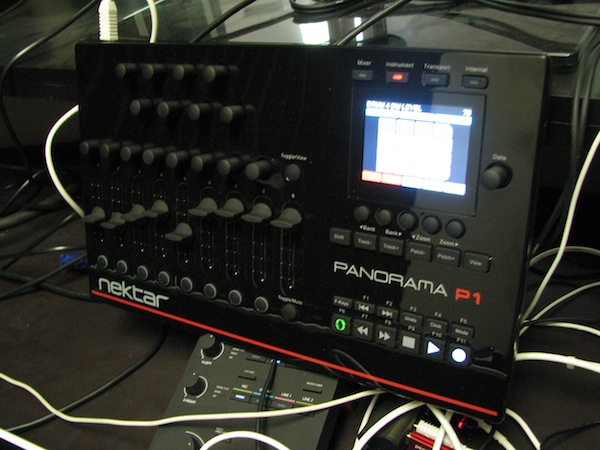
Whilst they do not produce any sounds on their own (i.e. they need to be connected to a sound-producing device or computer to be of use), they do provide a number of different controls for deep integration with your favourite software. Given the variety of controls on offer, the Panorama P4, P6 and P1 essentially combine a mixer controller, plug-in instrument/effect controller, transport controller and general MIDI controller in one unit, giving you a complete studio control device.
NEKTAR PANORAMA CONTROLLERS - CONTROLS
One of the key attractions of Panorama controllers is the number of physical controls that they provide you with. For starters, the P1, P4 and P6 are all built with 16 endless encoders. By 'endless' I mean that they have no physical start and end points. I personally prefer this design approach because the encoders can automatically mirror your software settings. For example, with such a versatile controller, you're probably not going to be using it to control the same software plug-in all the time; one moment you might be using the Panorama to control a virtual synth, whereas the next you might be controlling an EQ plug-in, etc. As the Panorama (in Instrument mode) will automatically take control of whichever plug-in you have in focus in your DAW software, each control will constantly be changing what software parameter it is mapped to. For example, with a synth selected, an encoder might be controlling the filter cutoff parameter. If you then switch to control a compressor plug-in, that same encoder might switch to control a threshold parameter. For this reason, the position of an encoder with a fixed start and end point would rarely reflect the position of the parameter that it was controlling in the software.
Still confused? Take this as an example: let's say that you are using an encoder with a fixed start and end point (i.e. you can only turn it so far in each direction before it reaches a minimum and maximum limit) to control the resonance of a software filter. In this instance, you set the encoder at its central (12 o'clock) position. However, you then need to switch to control a reverb plug-in and when you make the switch, that encoder automatically updates to control the 'reverb time' parameter. If, for example, the reverb time in your software is set to its maximum value, the encoder on your controller will not mirror this because it will still be set in the 12 o'clock position. To make the encoder position match that of the software (or alter the reverb time), you would need to turn the physical encoder to its maximum position (clockwise) so that it 'catches up' with the software position, and then you would be able to make adjustments to the software parameter with the hardware. If you then switch to another plug-in (which let's face it, is something that you're likely to do very often), you will have to go through this whole process again. Sure, it's only going to take a second each time, but add up how much extra time this is going to cost you when you're constantly flicking between plug-ins and you'll probably agree that it's a bit of an unnecessary pain, right?
I was therefore very pleased to see that all 16 encoders of each Panorama employ an endless design. This means that no matter how often you switch between plug-ins, your encoders will automatically take control of their associated software parameter and their virtual position will be intuitively displayed on the controller's screen (as well as on the plug-in's GUI on your computer of course).
Whilst I admit that in some situations encoders with fixed start and end points can be handy (and there are controllers out there that offer both as part of their design, e.g. Novation's SL MkII keyboards and Zero SL MkII control surface), I personally prefer the endless encoder approach where possible. Having owned an SL 61 MkII for a number of years, I found that I carried out the vast majority of my work using the endless controls and often found myself wishing that I had 16 endless encoders at my disposal, rather than 8 of each type. Don't get me wrong, the SL 61 MkII is a great keyboard (and one that I would still highly recommend), but the encoder design of the Panorama certainly suits my working style a lot more.
Moving onto the faders and something that sets the Panorama keyboards apart from their competitors is that they have a single motorised fader, which automatically shifts to reflect the level of your currently selected track. Please note that the Panorama P1 control surface does not have this feature.
Having the motorised fader is an extremely useful addition, making things like riding vocals (manually adjusting the level of a vocal recording while the song plays) a more intuitive process. The extended length of the motorised fader compared to the fixed faders also allows you to hone in and make finer adjustments to your chosen track should you need to.
So, what about those fixed faders? Having already discussed the cons of using general controls with fixed max and min positions, you would be forgiven for asking questions such as 'how do I know how the software parameter is set if the fixed faders don't move to reflect its position?'. This is a problem that you'll find with all MIDI controllers with fixed faders (which let's face it, is pretty much all of them!) and so working with them in the past has usually been a case of looking at your computer screen to see where the software parameter is set, comparing it to the position of the physical fader and then moving the fader up or down slowly until it catches up with the position of the software parameter, which will become apparent when the software control starts to move with the hardware fader movement. Again, it's a bit tedious, requires a bit of guess work and is something that has always slightly frustrated me with other controllers. However, with the Panorama controllers I was very pleased to see a clever workaround, which meant that you didn't even have to look at your computer screen in order to know what was going on and all the guesswork had been eliminated. Let me explain...
Let's imagine that in this scenario, the first fixed fader is controlling our track 1 level, which we set at 0dB. Now, we suddenly want to skip to slightly raise the level of track 9, which is currently set to -8dB in the software, so we shift along one bank so that our first fader is now controlling track 9. Obviously the physical fader will be set at the 0dB position, whereas the software track will be lower, at -8dbB, so our controls don't match up. This is where things get clever...
The screen on the Panorama will show a visual display of your current bank of faders, with a white mark on each to indicate the actual value of the parameter in the software. In this case, the white mark will indicate -8dB. However, there will also be a red marker on each fader on the display, which will indicate the position of the corresponding physical fader. In our example, the red marker will be set at 0dB as this was where we left our fader when we used it to set the level of track 1. If I then want to raise the level of track 9, I simply move the fader so that the red mark moves towards the white marker (down in this example) and then when the red marker is in line with the white marker, they will combine together and so moving the physical fader on the Panorama will also adjust the level in the software. In our example, once both the red and white markers are inline, simply move the physical fader up to raise the level of track 9 to the desired position. As I mentioned, I didn't even have to look at my computer screen to do this because all the relevant information was displayed on the Panorama itself. Of course, if you are adjusting single track levels with a P4 or P6 controller then the quickest way to do it would be to simply select the track that you want to alter and use the motorised fader to set your new level. However, the faders can be used for controlling things other than track levels depending on what mode you're in so hopefully this example demonstrates how visually informative Panorama controllers are whatever the situation.
In addition to the encoders and sliders, there are also a number of buttons that you can use to carry out specific functions depending on which mode you are in. For example, in mixer mode you can control the mute and solo statuses of each track, or in instrument mode the buttons might be used to toggle plug-in parameters. Each of the transport controls also doubles up to perform another task or set of tasks using the 'f-key' button as a kind of 'shift' key. What I mean by this (and this was another feature that really impressed me) is that you can assign up to 8 steps to a single button so that they can be performed, in sequence, with a single press - a superb time-saving tool. In one example given by Tim, he had programmed a button on his Panorama P4 to close all open plug-in windows (which was about a 3 or 4 step process in Cubase) to de-clutter his screen and return to the main arrange window. Handy indeed.
NEKTAR PANORAMA CONTROLLERS - SCREEN
Another aspect of Panorama controllers that I really felt set it apart from their competitors is the screen, which was large enough to give really detailed feedback about what you are controlling, eliminating the need to look at up at your computer screen for many of your most common tasks. I've already explained how the screen shows you any differences in positions between the controller's physical faders and the parameters in the software, but it really can do so much more. For example, it displays the name of your selected track in Mixer mode, MIDI CC numbers in Internal mode and it shows you which software parameters are assigned to which physical controls so there is never any confusion about what you will be adjusting when you move a control on the Panorama. It also feeds back how your pads are set up if using a P4 or P6 keyboard and it does a whole lot more that I just wouldn't have space to list in this review, including allowing you to scroll through certain menus in your software and make selections and assignments.
On this note, given how much Panorama controllers can do, there is the inevitable menu diving if you want to take full advantage of its power, although the good news is that for all your most common workflow tasks, the most you'll have to do is press a button to switch modes. However, should you feel the need to go deeper, each Panorama controller provides 5 buttons underneath the screen for making selections and a data encoder for scrolling.
NEKTAR PANORAMA CONTROLLERS - PADS
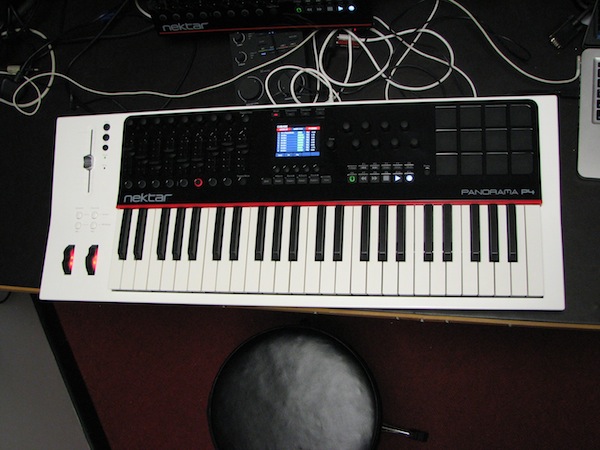
With the Panorama P4 and P6 keyboards, you will notice that you are provided with 12 pads, which have a very nice feel to them. If you're working with a project that requires more than 12 pads then you will be pleased to know that you can virtually increase them with banks.
I imagine that most people will use the pads to trigger samples and perform percussive parts in an MPC-sampler kind of way and so these people will be extremely happy to learn that setting up your pads is quick and easy. Unfortunately I can't remember what mode he was in, but when Tim demonstrated setting up the pads, he tapped a couple of buttons and then it was simply a case of pressing the pad that you wanted to assign a sound to and then pressing the keyboard key that played the desired sound. It was that simple! You can then move straight onto assigning a sound to another pad if you wish and audition sounds as you go.
Time to mention another impressive pad feature of the P4 and P6 keyboard controllers and that's the scale feature. The P4 and P6 have been programmed with a huge selection of different scales, which can be instantly mapped to the pads in order to control your currently selected instrument. This means that instead of using the keyboard keys to play a melody, you can simply use the pads and because each pad is allocated a note within a chosen scale, what you play will always be musically 'correct'! This can be really useful if you're not a great keyboard player, you're not clued up on music theory or you want generate melody ideas quickly. If you're lacking musical inspiration, just select a sound on your computer, hit a few pads in your chosen scale and hopefully your jamming will result in something pleasing that you can use in a song. Alternatively, if you want to learn about scales, this can also act as a great tool as the screen displays information on each of the notes in the selected scale. There's even a 'Gypsy' scale available!
Of course, if you already have a favoured pad controller then the pads on the Panorama P4 and P6 can be assigned to act as hot keys for some of your favourite functions instead.
NEKTAR PANORAMA CONTROLLERS - FEEL
Let's start with the feel of the keyboard on the Panorama P4 and P6. As you've probably already read, the keybeds are semi-weighted and Tim explained to me that they had been designed to satisfy both piano and synth players. I for one was very impressed with how they felt and for what I look for in a keybed, it was near perfect. Importantly, it felt solid, yet had a fairly light touch in order to allow me to play expressively. Whilst I have favoured keyboards with a heavier feel in the past (Akai's MPK range springs to mind), I always found that their firm response forced me to play more aggressively than I sometimes wanted to. The only negative point about the Panorama keyboards that I picked up on was that they had slightly more mechanical noise than some controllers that I've used in the past, i.e. when I released a key I could hear a small 'clunk' as the key popped back up. Nothing drastic but in order to make this an honest review I thought I had better mention it.
Another important factor for me when buying a controller keyboard is how the controls feel. I like my controls to feel solid, so that it feels like I'm actually doing something when I adjust them. I'm not a fan of loose controls as I find them less fun to work with! The quality of the controls on my current MIDI keyboard, the Akai MPK49 was something that had a huge impact on me purchasing it for this very reason.
I was very pleased to note that the controls on all the Panorama controllers felt very good. They didn't feel flimsy or loose, so when I was turning the encoders and moving the faders, it felt like I was working with a good quality piece of gear. Yes, the faders are plastic, but they were nice and chunky, which made them pleasant to work with and after all, pretty much all MIDI controllers on the market today have plastic controls to keep costs down.
NEKTAR PANORAMA CONTROLLERS - NO WRAPPER
Another key point to understand is that unlike most controllers that come with intuitive mapping features, Panorama controllers don't come with a wrapper, i.e. the keyboard communicates directly with your software of choice and vice versa; there is no software in between them handling how data passes between the two. This contributes to a simpler, smoother and more fluent workflow, which are all big ticks in my book.
NEKTAR PANORAMA CONTROLLERS - INTEGRATION & ASSIGNMENTS
When Nektar's original Panorama P4 controller was released, it was heavily marketed as the ideal Reason controller. This was because Nektar had programmed it with a special Reason patch, which intuitively mapped all its controls to the Reason DAW and made sure that the controller gave detailed visual feedback from the software on its screen. However, this doesn't mean that Panorama controllers will only work with Reason. Just like other MIDI controllers, they will work with all major DAW packages and come with pre-mapped templates for a number of other major DAWs, including Ableton (which I use!).
Panorama controllers now also feature the same super-tight integration with Cubase software and thankfully, Tim confirmed that they were working on bringing this sort of integration to other popular DAWs (although unfortunately he wasn't allowed to reveal which DAW was coming next). It does of course take time to achieve such deep integration with any DAW though and the Panorama team want to make sure that they get it just right, so we'll forgive them for building in small steps won't we? I've definitely got my fingers crossed for the Ableton announcement though!
If you're using either Reason or Cubase and you need a MIDI controller then I would definitely recommend a Panorama. You're not going to get this level of integration with other keyboards that are currently on the market and with Panorama controllers, it's all about improving your workflow and speeding things up. When using these DAWs you can even use the Panorama's controls and bright screen to do things such as load plug-ins into insert slots in your tracks without looking at your computer! You can select your track, select your insert point and scroll through your entire list of plug-ins using only the controls and screen of the Panorama! This is just one example of the type of deep integration that you get with Reason and Cubase and it is highly impressive stuff!
However, if you're using something other than Reason and/or Cubase then I would still say that the Panorama is worth your consideration. After all, they still give you more than most other MIDI controllers; you get a good quality keyboard, lots of assignable controls with a great feel to them, a motorised fader (with the P4 and P6), 12 high-quality pads (P4 and P6) and a hi-resolution screen for detailed visual feedback.
True, if you're not using Reason or Cubase then you'll find that you will have to work more with MIDI CC messages, manual assignments and you'll be forced to look at your computer screen more for detailed feedback, but hey, that's what you're going to get using any other keyboard out there too! If you use Reason or Cubase, you just get a bonus, although as I mentioned, the Panorama team have confirmed that they are working on creating deep integration with more DAWs and more plug-ins are constantly being announced as Panorama-compatible, so if you own a Panorama, things should just continue to get better and better.
One point to make about the automatic mapping process is that although you can save your own custom maps using the Panorama, your mappings are actually saved as a file on your computer. This is handy because it means that if you find yourself working in another studio with another Panorama controller, you can simply transfer your file to the new computer and load it up for use with the keyboard/control surface and everything will be set up just as you like it!
Another point to make clear is that in order for the Panorama to give the most detailed feedback, both the DAW that you are using and the plug-in need to have been pre-configured by the Panorama team. However, as we already mentioned, this doesn't mean that you can't use un-configured software with the Panorama; if the DAW/plug-in is not configured then you just won't have access to some of the deeper integration features that the Panorama currently offers with Reason and Cubase.
NEKTAR PANORAMA CONTROLLERS - CONNECTIONS
Both the Panorama P4 and P6 keyboards feature a USB Micro B connection for powering the unit or providing extra power for the motorised fader, a standard USB port for transferring data to and from your computer, a MIDI output for sending data directly to a MIDI interface or sound module, plus a foot switch and expression pedal connection (both of which can be assigned to parameters of your choice within the Panorama). Please note that the pedals must be purchased separately though.
The Panorama P1 on the other hand just features a USB port and a sustain footswitch connection. Initially the lack of 5-pin MIDI ports did concern me with the P1 but when I actually thought about it, I don't know why it would actually need this feature! I would find the MIDI output on the keyboards useful for hooking directly up to my older synth modules if I wanted to play them without turning on my computer, but as the P1 doesn't feature any keys or pads, it's highly unlikely that I would ever want to hook it straight up to a piece of hardware. Sure, it could be used to access and manipulate some of the more in-depth features of a synth, but in all honesty, I think that 99.99% of people are just going to want to have to have this constantly hooked up to their computer as a control surface.
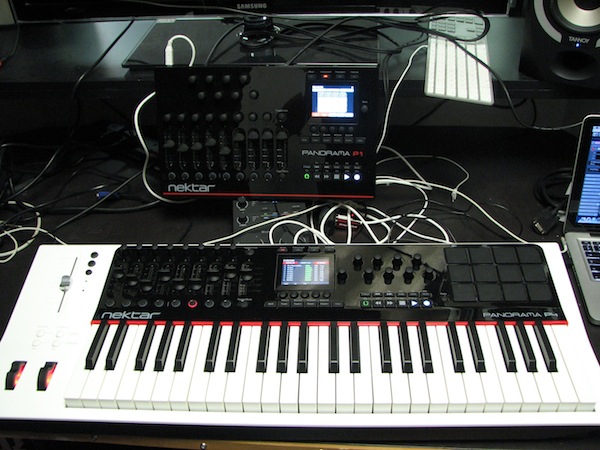
NEKTAR PANORAMA CONTROLLERS - USING MULTIPLE CONTROLLERS
As Tim had the Panorama P4 set up alongside a P1 in our studio, I was intrigued to learn how multiple controllers could work together. The first thing to be aware of is that any controller that you have connected to your computer can only 'see' what your DAW 'sees'. For example, if you have an EQ plug-in in focus in your DAW and a delay plug-in in the background, all connected controllers will only be able to interact with the EQ plug-in. You couldn't for example, use one controller to manipulate the EQ and a second Panorama controller to access the controls of the delay plug-in. This is because in the eyes of your DAW, the delay plug-in is not in focus and so cannot be manually accessed until it itself is brought into focus.
However, as each plug-in is communicating directly with your DAW and not with a wrapper, multiple Panorama controllers can act independently of each other. For example, you could combine two Panorama P1 controllers and set the first to control channels 1-8 in your mixer and the second to control channels 9-16! This is not usually possible with controllers that use wrappers, because if the wrapper is focussed on, for example, channels 1-8 in your DAW, it will pass this information to all connected controllers so they will all be focused on the same thing.
Because Panorama controllers can act independently of one another, this allows you to create some really cool set-ups. For example, you can set one to 'Mixer' mode to control your levels and one to 'Instrument' mode to control your in-focus plug-in. Or, if you are using ReWire to link Reason in with another DAW, you can use one controller to trigger an instrument in Reason and the second to control an instrument in your second DAW!
NEKTAR PANORAMA CONTROLLERS - SUMMARY
I have to admit that I came away from playing with the Panorama controllers with a big smile on my face and I'm now seriously considering grabbing either a P4 or P6 keyboard for myself. Importantly, the Panorama P4 and P6 combine a high-quality keyboard with controls that feel solid and the addition of a motorised fader just makes the prospect of owning one even more appealing.
The other aspect that really appeals to me about Panorama controllers is that hi-definition screen, which I think will really help to streamline your workflow. It gives such detailed feedback that you really hardly ever need to refer to your computer screen if you're using a configured DAW and plug-in.
As an Ableton and Logic user, I'm aware that I'm not (yet) going to be able to take advantage of some of the deepest integration features that Panorama controllers currently offer with both Reason and Cubase. However, with Tim's revelation that this type of tight integration is on the horizon for a selection of other DAWs, I couldn't help but get a little excited! After all, even if I were to use a Panorama in its current state with Ableton, it still gives me more than most other MIDI controllers on the market (e.g. motorised fader, screen, etc.) and it still comes with templates for using it with most major DAWs. However, with the added incentive that sometime in the near future, the Panorama may suddenly evolve into a some kind of super controller for my own DAW, I'm finding it hard to think of many reasons why I should opt for something else.
Considering what's on offer on the current market I would say that Panorama controllers represent good value for money when you consider what they give you. The P1, for example, would be a superb addition to a computer-based set-up for anyone who already owns a controller keyboard but wants more hands-on controls or a constant mixer controller.
Finally, I'm going to mention the set-up and Tim himself admitted that a Panorama controller couldn't really be described as 'plug and play'. Given the complexity of the controllers, you will need to spend a few minutes configuring it with your system and make sure that you follow a fairly lengthly set of instructions, which may intimidate the less technical minded or computer savvy out there. However, for those that want to reach the promised lands of a controller that integrates so tightly with your computer and software that it practically feels like a single entity, the set-up time will be more than worth it and once you've done it once, you should have a smooth and fluent ride from there onwards.
So, my advice would be this... if you're after a MIDI controller with a great feel and plenty of hands-on controls, I would seriously consider a Panorama controller. Even if you're not a Reason or Cubase user, Panoramas still provide you with touches of magic that you wouldn't get with other controllers. However, if you do use Reason or Cubase, the Panorama simply provides you with a shed load of bonus features, becoming a kind of super-charged controller for your studio!
My hands are gradually edging towards my credit card having demoed the Panoramas... I've just got my fingers and toes crossed for the announcement of even deeper Ableton integration in the near future, which for me would make it a real no-brainer.
NEKTAR PANORAMA CONTROLLERS - BUNDLES
As well as selling Panorama controllers on their own, we've also got a selection of great money-saving bundles, where you can grab a controller alongside some software and/or an interface and save £££s!!!
NEKTAR PANORAMA CONTROLLERS - REVIEW UPDATE - I BOUGHT ONE!
When I originally wrote that I was tempted to bag myself one of these controllers, I wasn't lying! The wealth of features combined with the solid build made them really appealing to me. However, the event that pushed me to make the purchase was when I tried Bitwig Studio for the first time, which the Panorama controllers are highly integrated with...
Now, I could go on here to explain exactly what attracted me to Bitwig, although this really does deserve a whole review on its own. I'll therefore keep it brief by explaining that Bitwig really sped up my workflow and allowed me to quickly experiment with variations in my sounds and songs that I would be too lazy to do in other DAWs, because of the laborious steps required to achieve the same results. Yes, there are some little bugs in there still, which I hope will be ironed out in the very near future, but there's no denying that the workflow really does push you to experiment and try new things, rather sticking to the same old formula for each track. It's extremely refreshing and I think it's a credit to the software that it convinced me to switch over from software that I was a lot more familiar with - no mean feat at all! Perhaps the most exciting thing is that I know that this is the first version of Bitwig, so if things can only can better then I'm intrigued to see what happens next!
Anyway, having been won over by Bitwig, teaming it up with a Panorama was a no brainer for me. Given the fact that I needed a keyboard, wanted the motorised fader, but did not have space for 61 keys, I naturally went for the P4 and I haven't looked back. You can in fact get this exact same partnership in a money saving bundle from us, which I can highly recommend - click here (or with the P6 - click here).
I must admit that so far, I've not used a lot of the in-depth features of the P4 in my own studio as I've mainly been focusing on getting used to all the features of Bitwig. However, I'm very much looking forward to delving deeper in the near future; with Bitwig, the Panorama can even function as a step sequencer, which is something that I will be testing out very soon. However, even without using these deeper features, the way that everything automatically sets up exactly the way I would want it; the motorised fader and the mute, solo and automation mode buttons (which give instant access to key features of individual tracks when selected) gives the Panorama keyboards an edge over the competition, in my opinion. I've certainly not looked back since I've bought it and if you're using a DAW that's deeply integrated with a Panorama (Reason 7/8, Cubase 7.5, Logic Pro X, Bitwig at the time of writing), then I getting yourself a Panorama to improve your workflow would end up being a very wise investment indeed.
For more information on any Nektar Panorama controller or bundle, click the link below, call us on 01202 597180 or e-mail shop@absolutemusic.co.uk.
CLICK HERE to view all of our Panorama controllers and money-saving bundles